Raspberry Pi
While working on this project I highly advise you look at the pinout for the raspberry pi here: https://www.jameco.com/Jameco/workshop/circuitnotes/raspberry_pi_circuit_note_fig2a.jpg
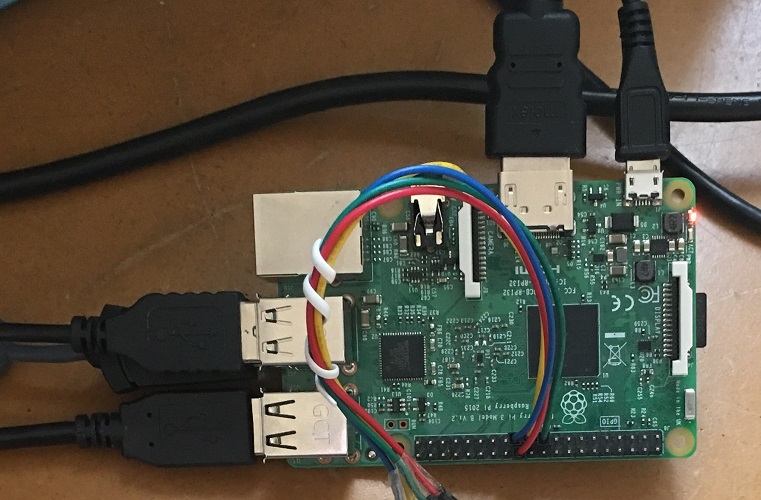
The only pins we use on the raspberry pi, are pin 19, 21, 23, 24. You have to connect the MOSI pin (Master Out Slave In ) into the MISO pin (Master In Slave Out) of the Microcontroller and vice-versa. then your pin connections to the raspberry pi are complete!
And reference it if you have any trouble with connecting the SPI pins.
Also the code for our project is downloadable here
We used the Thonny IDE that comes with the Raspbian linux distribution for our Python development. We also used the Processing IDE for javascript development and run our graphic interface.
In our project, the raspberry pi manages the microcontroller over an SPI connection as the master of the bus. This means that if your microcontroller code is much different you may need to change the raspberry pi code in order to make this project work.
This is a general outline of how our Python and Processing scripts work to make the crane run. If you want more details on the implementation please check SPI_Joystick_Motor_Drive.py , PID.py and PythonComms.pde. If your hardware differs you will need to do more research to make sure it is compatible with our SPI communication style, evdev event codes for joystick commands and other hardware-specific issues.
Python 1. Handles joystick input using evdev library 2. Handles SPI input/output using spidev library 3. Calibrates position and rotation based on several tests, abstraction of data PID algorithm code 4. Scales PID outputs into Joystick-like data 5. Outputs calibrated data to processing using a socket Processing (Javascript) 1. Accepts input from the python program over a socket 2. Plots Data from the microcontroller for educational purposes only 3. Animates a crane on screen to confirm data matches crane 4. Displays current mode, Calibrations completed or not completed 5. Holds graphical part of user interface for Auto mode